Using DigitalOcean Spaces for Image Storage
Photo taken today from my window, now stored using Spaces 🌥️

While building this site, I tried out Spaces by DigitalOcean to store photos. This tutorial will show you how I have everything set up.
Motivation
I wanted a place where I could store and share multiple high-res photos. Until now, I have stored the photos for this website locally next to the code, but this solution does not scale very well. Storing the photos elsewhere would free up space in my repository and allow me to use a CDN, which can increase the speed of serving static content.
Spaces by DigitalOcean is a great alternative to AWS S3, as it supports the same API, has excellent documentation, and is reasonably priced. As a part of the GitHub Student Developer Pack, I have received $200 of credit to use on DigitalOcean, making it very tempting to try out.
Domain registration
I registered a new domain, which I plan on using for multiple DigitalOcean services. Setting up a bucket without a custom domain is also totally doable.
I purchased my domain on namecheap, and swapped out their default nameserver settings to point to ns1.digitalocean.com. This allows DigitalOcean to manage the domain, which makes configuring the domain very easy.

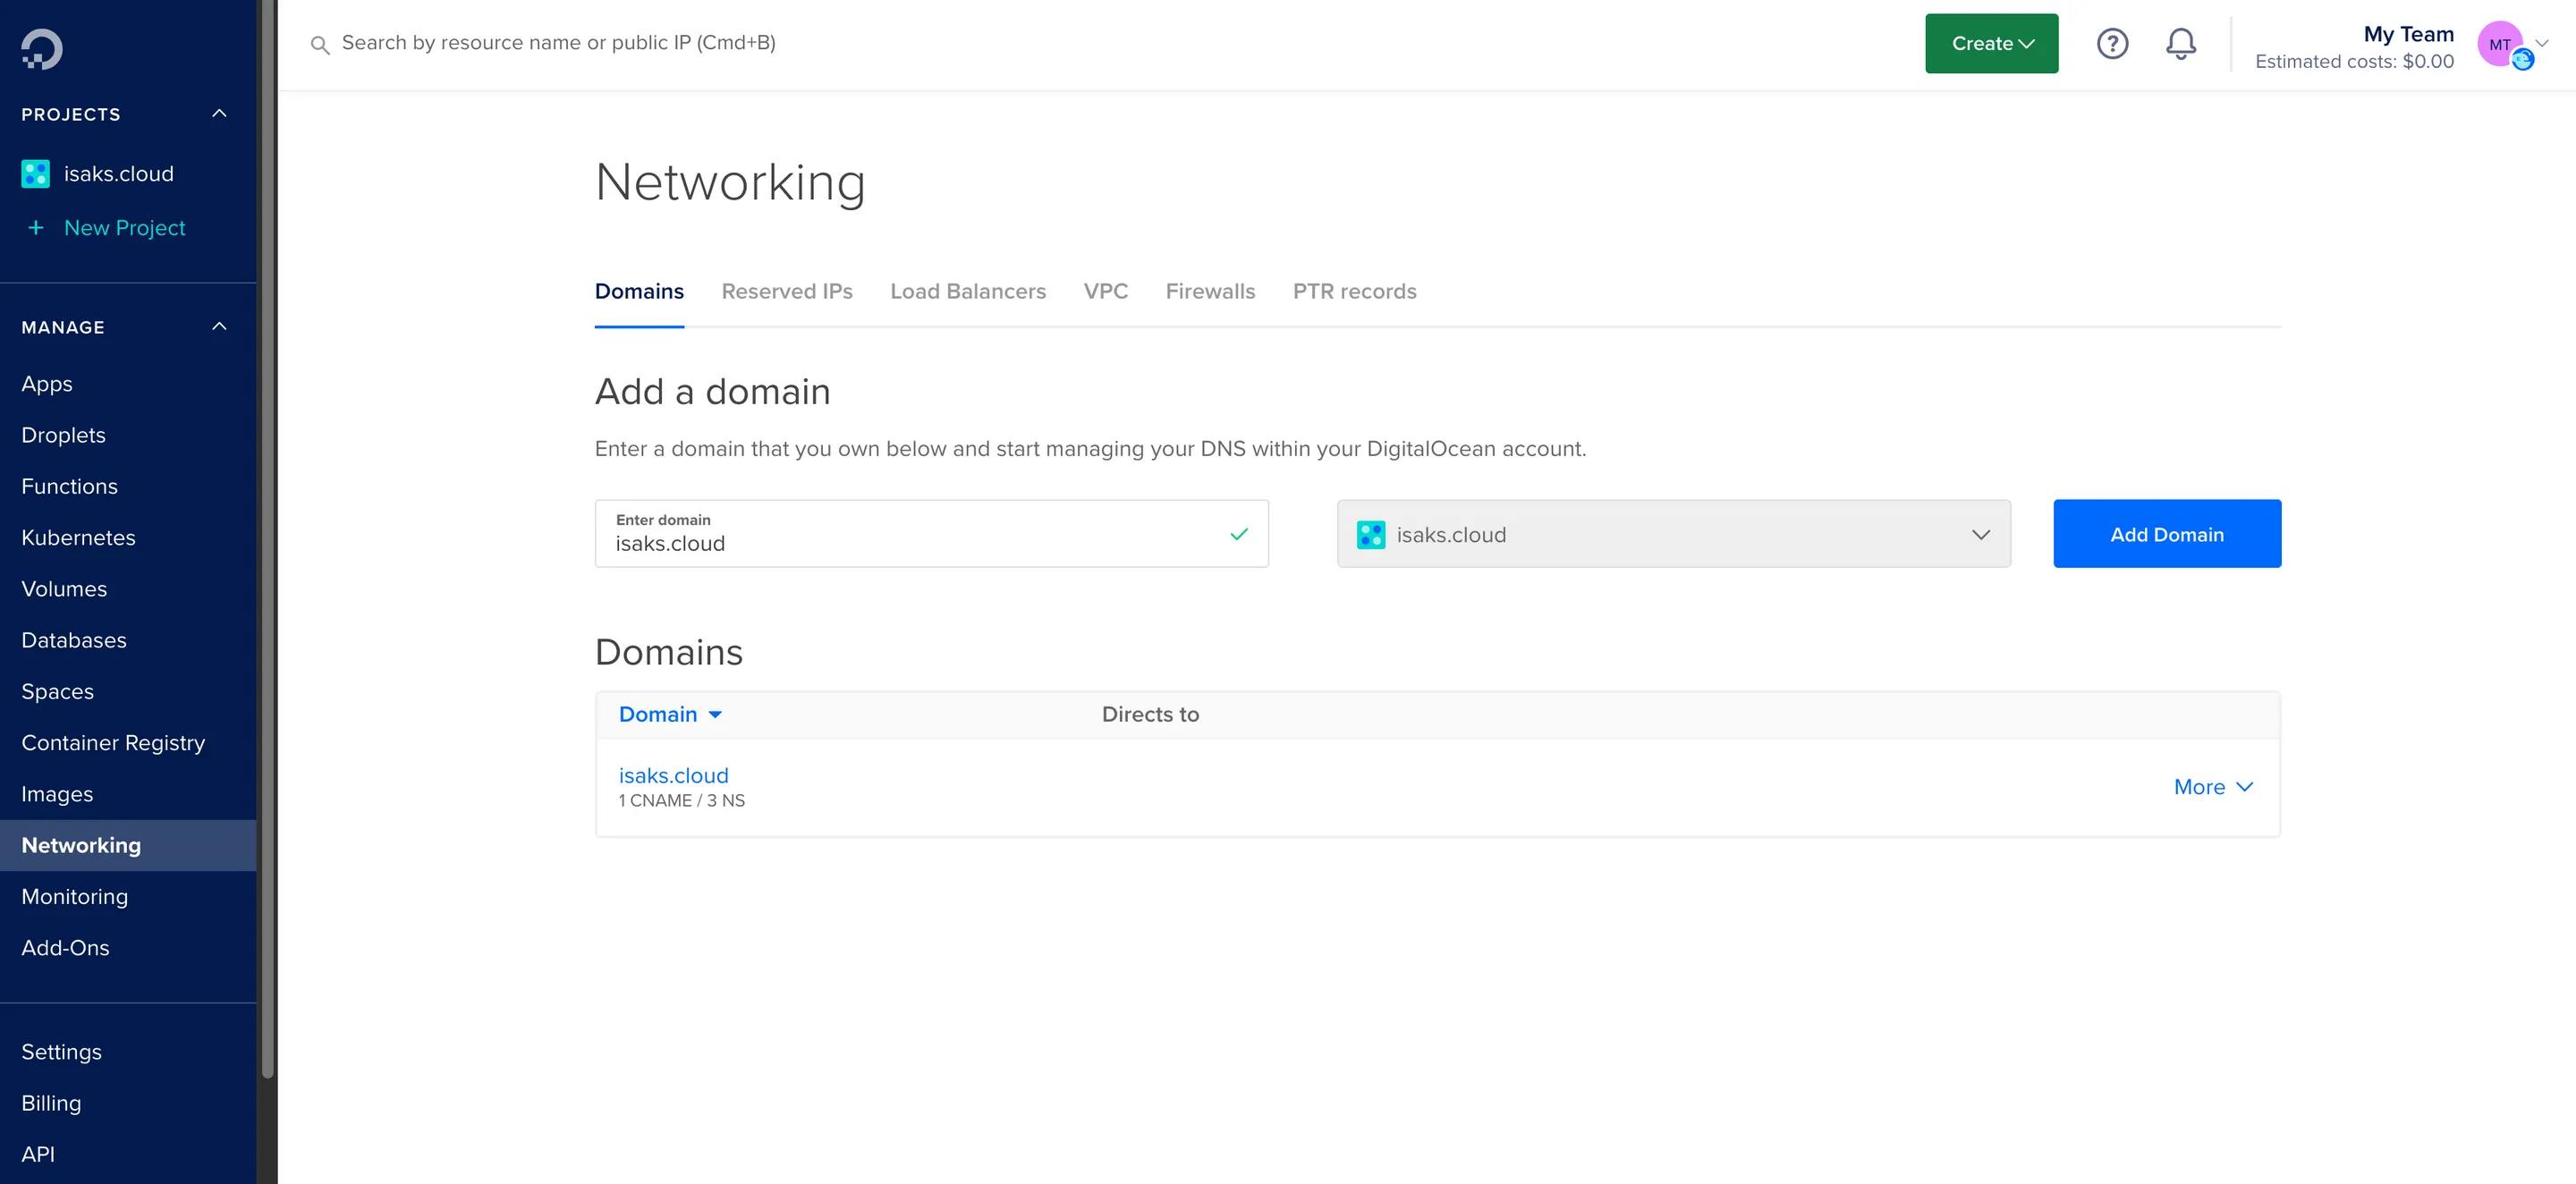
Next up, in your DigitalOcean Cloud Dashboard, add your domain to your project from the Networking tab:
Creating a Space
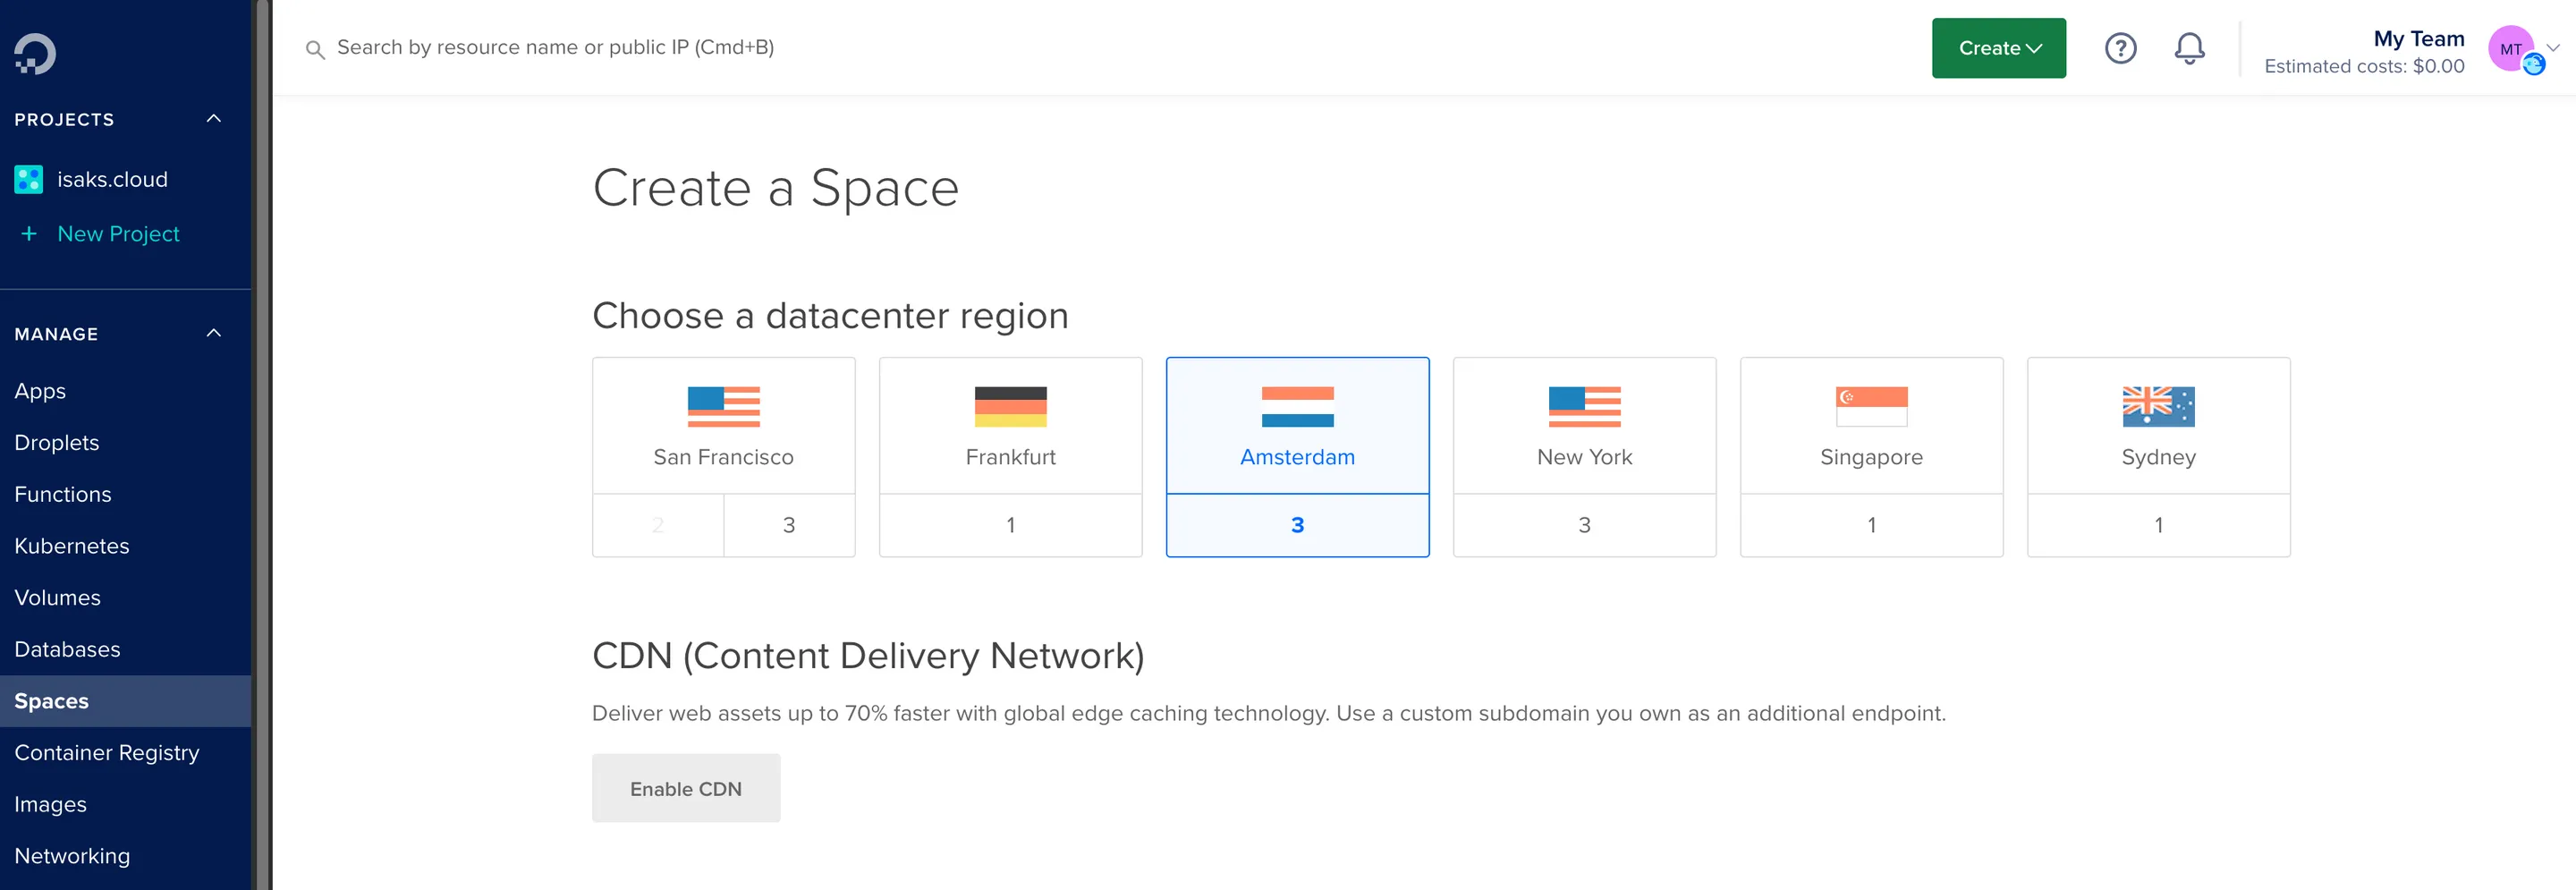
Hit the top Create button and choose Spaces. Then, select a datacenter region. I chose Amsterdam as it is the closest one to me.
CDN
DigitalOcean makes it easy to enable a CDN for free. Hit Enable CDN and choose your custom domain (if you have one). Then, enter the subdomain you wish to enable, which in my case is photos.
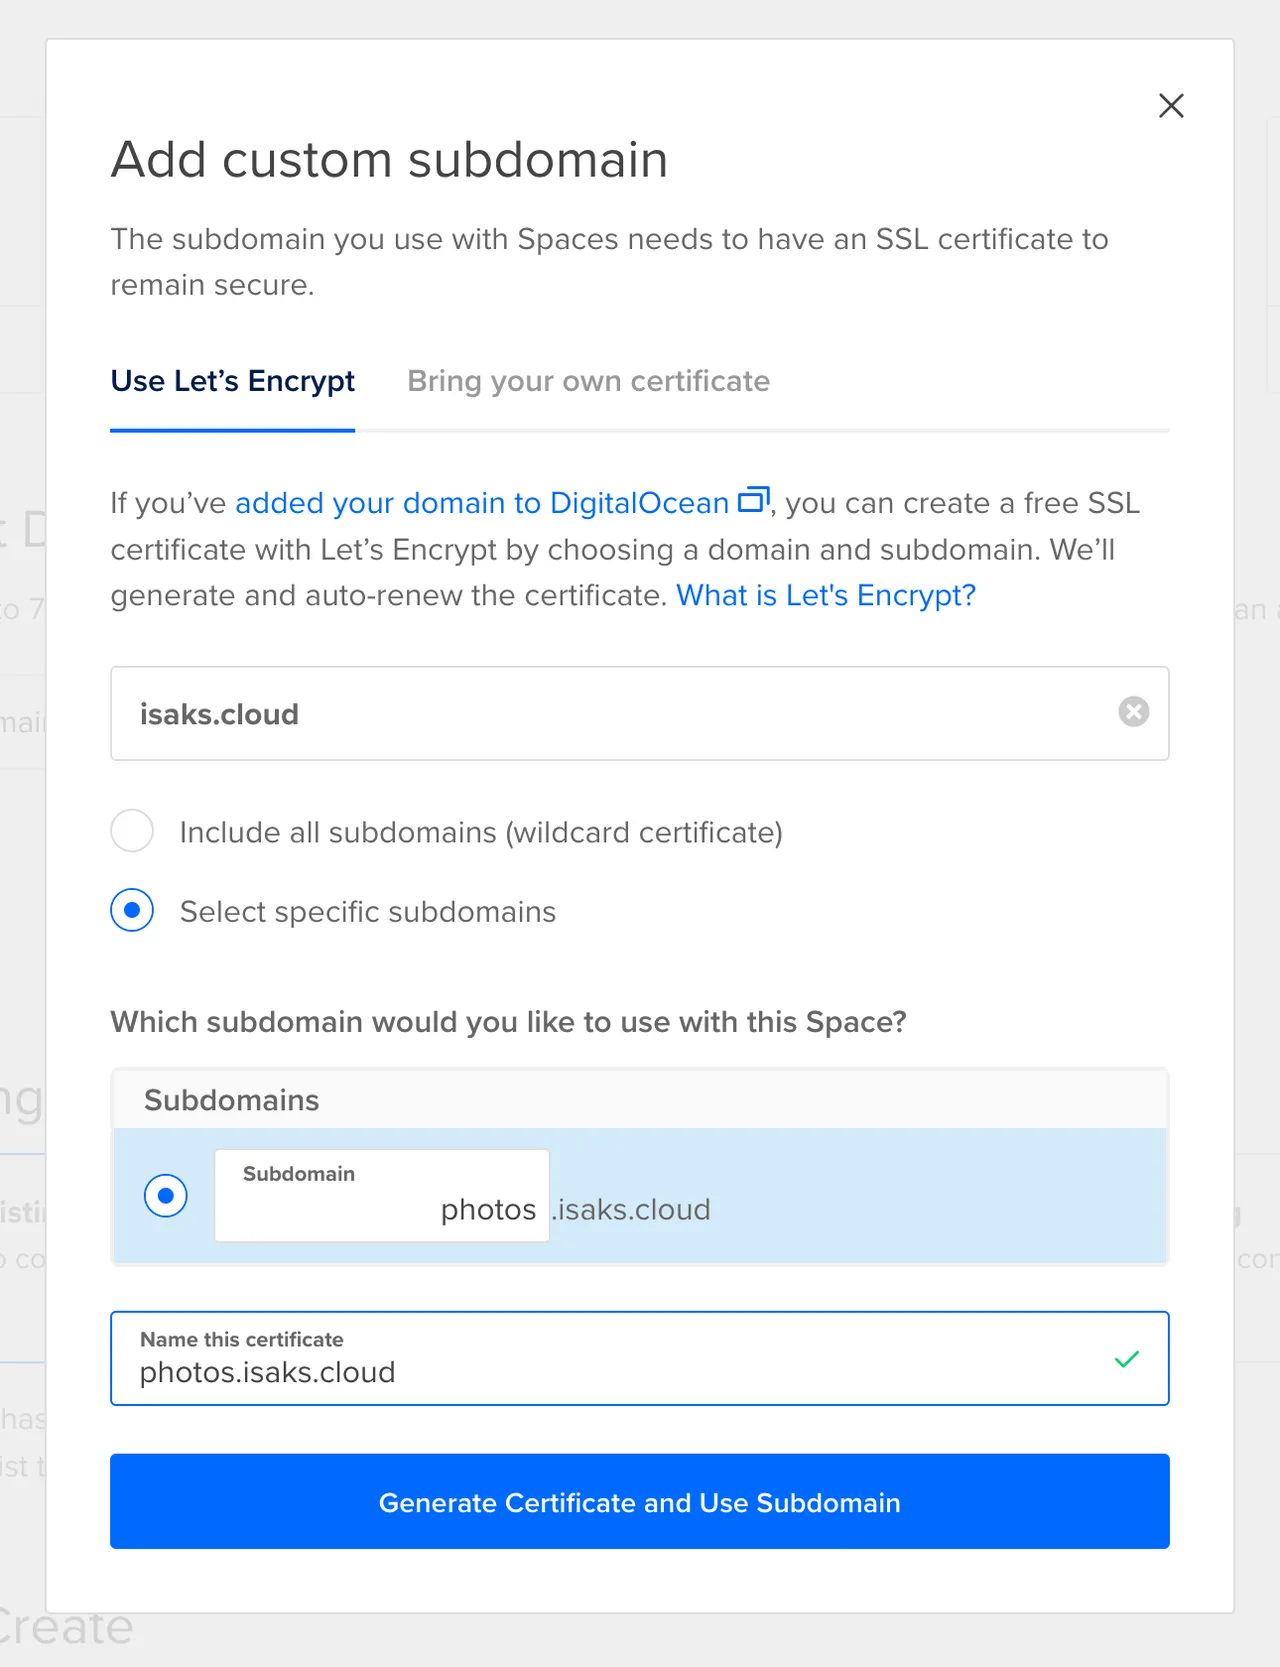
DigitalOcean will now generate an SSL certificate and set up a new CNAME record for your subdomain.
Restrictions and name
Leave File Listing Restrictions turned on, and select a unique name for your space.

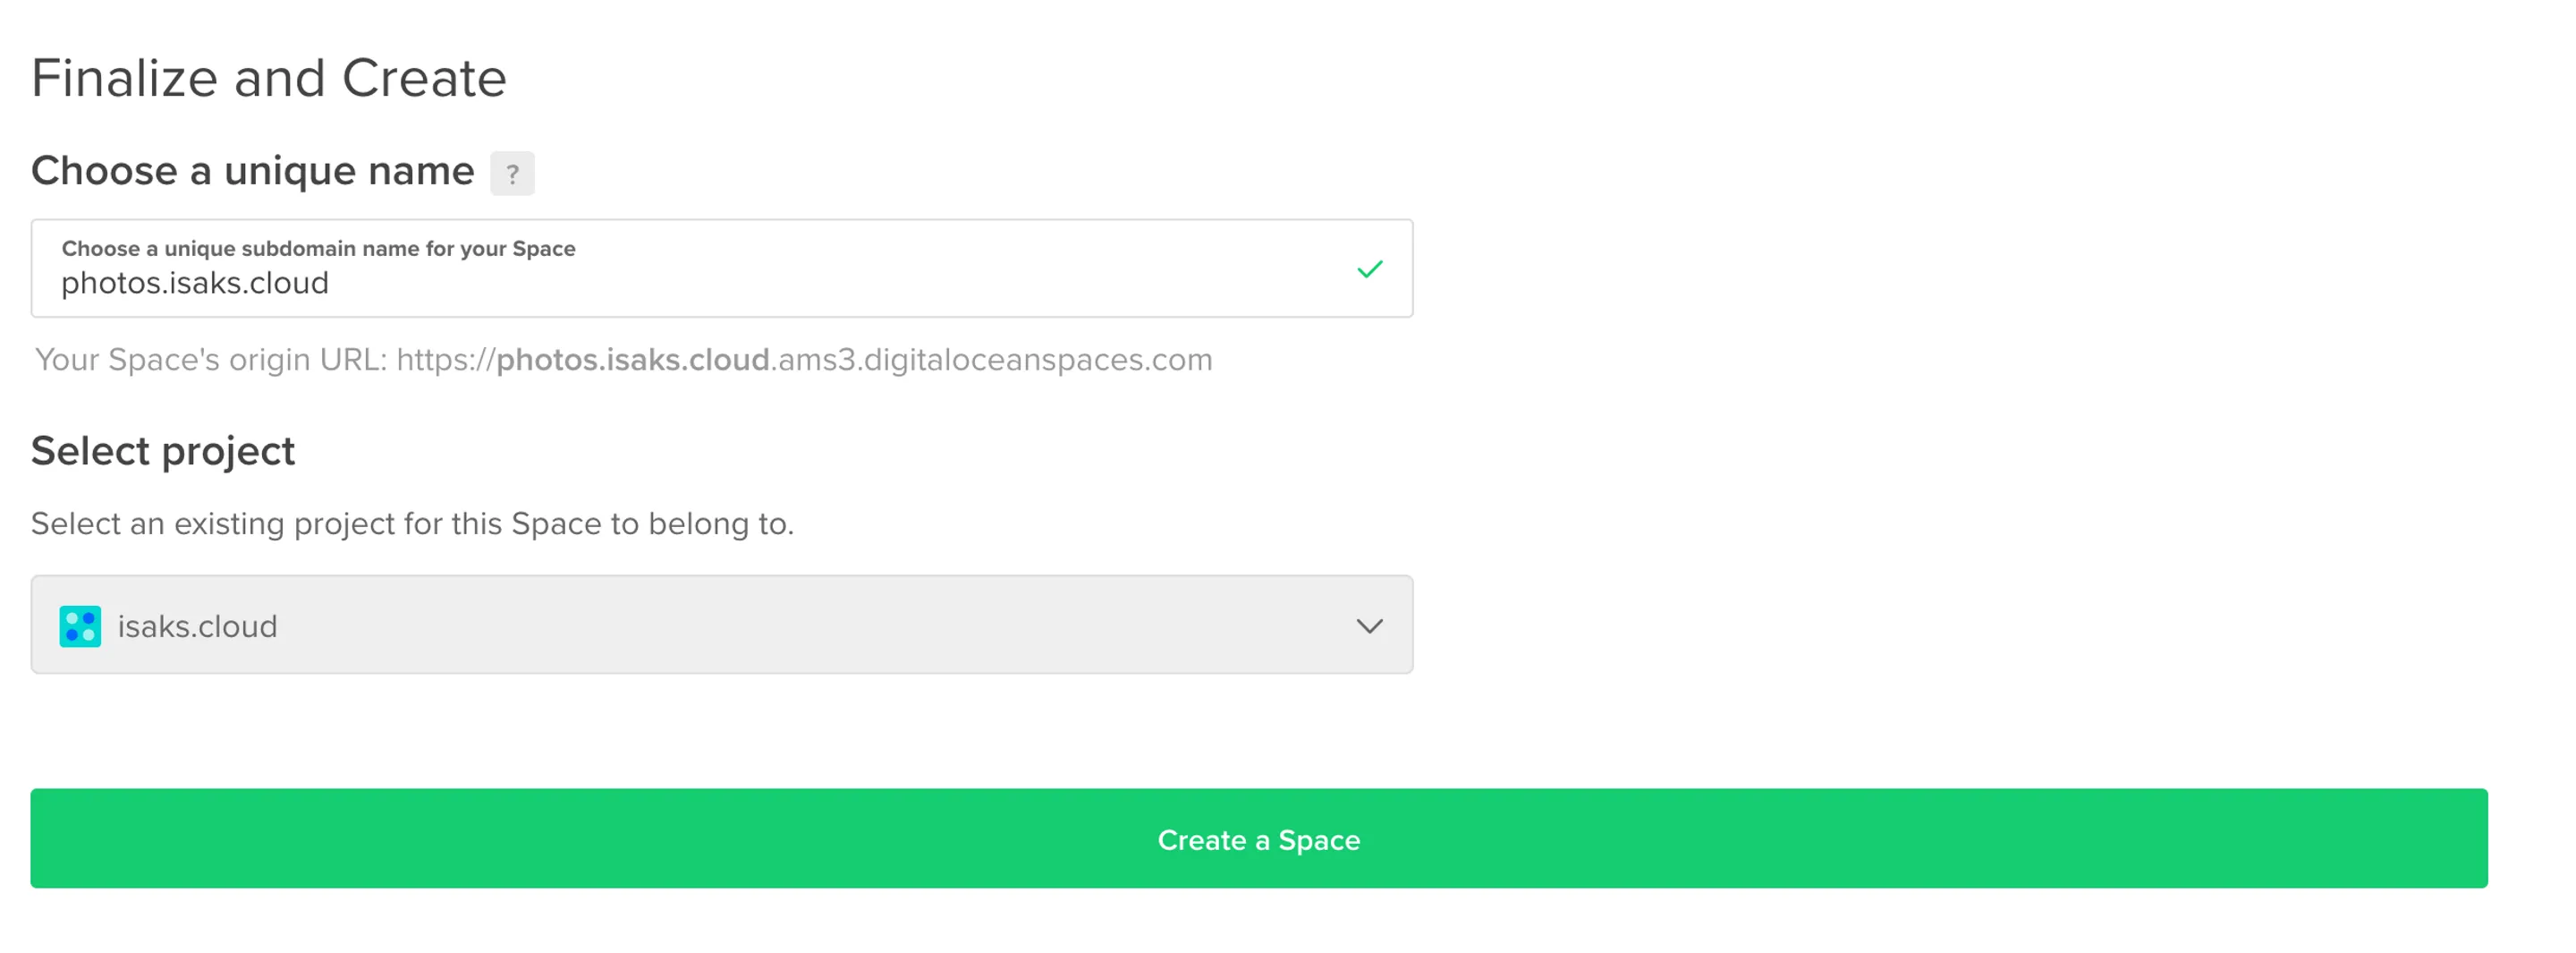
Note: Including dots in the space name might result in https problem. This should not be problematic if you use your own domain.
Uploading photos
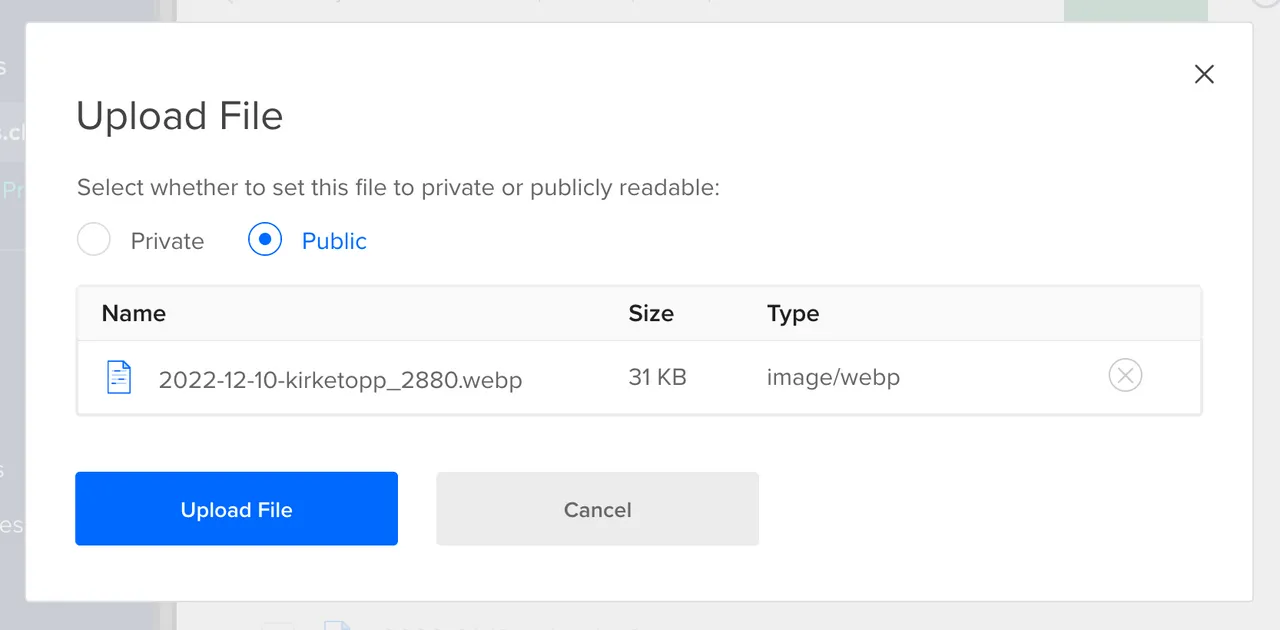
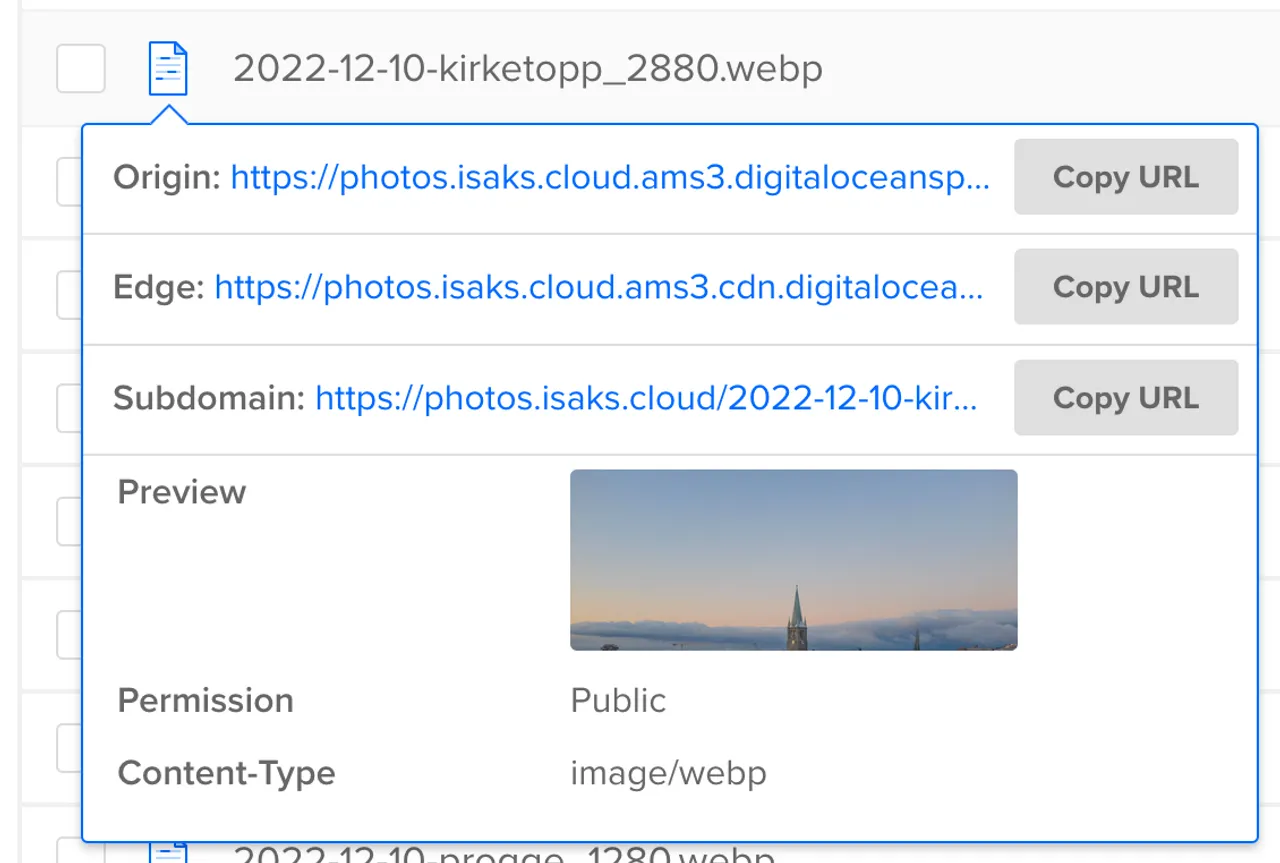
You can now start uploading images to your bucket, either through their UI or by using something like s3cmd.
And that's it! You should now be able to access your image 🎉
Conclusion
I'm very happy with Spaces so far. If you want to try something similar, feel free to use my referal link to get $200 of credit, which you can use for two months.
🌴